WEEKEND GARDENING
Citrus surprise
Create your own citrus fruit-salad tree
Imagine if the one citrus tree in your garden was capable of growing every type of citrus fruit on that one tree, so that on one side there were lemons and oranges, and on the other, say, cumquats and mandarins.
Further around there could even be grapefruit and lemonade fruit so you can squeeze some refreshing lemonade juice on a hot summer’s day.
Through my travels around home gardens I’ve met many who practise the art of grafting and budding but, no one better at it than Vincenzo, who taught me a simple but very effective budding technique that pretty much has a 99 per cent success rate.
Unlike grafting, which is done during winter and early spring while both the scion (a shoot or twig with buds) and rootstock (the plant a scion is grafted onto) are dormant, budding can be done during the growing season providing the weather isn’t too hot.
This technique has been handed down from generation to generation. Now, allow me to share it with you.
Tools required
- Sharp grafting/budding knife or retractable blade
- Budding tape
- Sealing compound
- Rootstock (preferably a lemon tree)
- Scion (30cm twig from a citrus tree of your choice)
EXAMPLE
Budding an orange onto a lemon tree
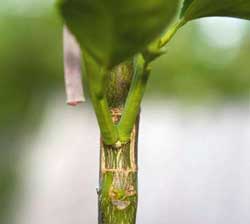
- Using secateurs, cut a 30cm branch from an orange tree that is about 15mm or larger in trunk diameter and no more than two years of age.
- Remove all the leaves then locate the buds along the branch.
- Pick a strong, fresh-looking bud then, using the budding knife or blade, cut a rectangular shape around the bud — only as deep as the outer bark layer and not into the wood of the tree.
- Using the edge of the blade, carefully lift one side of the cut-out carefully peeling the bark to remove the bud from the branch. To avoid contamination, be careful to never touch the inner surface of the bud.
- Choose a branch on the tree that you are going to attach it to then pick a location on that branch that is facing out from the centre of the tree and is clear of any existing buds.
- Position the bud template on the branch, making sure the bud is facing upwards away from the ground.
- Using it as a template, make the two horizontal cuts above and below the bud.
- Remove the bud template then make the two vertical cuts narrower than the bud template.
- Remove the cut-out (old bark) from the branch, then carefully lift the bark on either side of the vertical cuts.
- Position the new bud onto the cut-out; it should fit like a glove but with a slight overlap of bark from the tree’s bark on either side.
- Secure the new bud and bark with a piece of clean nylon string or budding tape, covering the entire area except for the bud itself.
- To protect the new bud from frost and extreme heat, remove a leaf from the existing tree and wrap it around the branch a few centimetres above the bud graft to protect the new graft. Secure it at the top end with a piece of budding tape.
- Cut back most of the branch above the bud work to ensure good sap flow is directed to the new bud.
-
After 6–8 weeks, signs of new growth should appear. Remove the protective leaf and the nylon string or budding tape keeping the new bud in position to allow the new shoot to grow freely.
Find out more about pruning fruit trees and gardening on Complete Home.